Categories: "Methods"

Frozen Brussels sprounts — Ninja Speedi version

by Don  

2023-07-03:  I tossed 12 0z of frozen Brussels sprounts in Italian dressing and popped them into the Speedi using the "steam and crisp" function for 5 minutes at 450°F using 1/2 cup of water.  When I checked them they were not yet crisping, so I added 5 minutes on bake at 450°.  They came out fine.

Next time I think I'll try 3/4 cup of water and 9 minutes at the same temp in the "steam and crisp" mode.

Double chocolate brownie baked oatmeal bake — Ninja Speedi version

by Don  

Original source:  video | written

Commentary

This is my first attempt at adapting an oatmeal bake recipe for the Ninja Speedi.  I am using a CasaWare 7-Inch Toaster Oven Ultimate Series Commercial Weight Ceramic Non-Stick Coating Square Pan (link).  I was a bit worried that it might not leave enough steaming/baking space at the sides, but that turned out to be a non-issue.

Ingredients

  • 2 cups of water for steaming
  • 1.5 cups (120 g) old fashioned oats
  • 1.5 scoops (45 g) vanilla protein powder
  • 1/2 tsp (2 g) baking powder
  • 2 tbsp (10 g) cocoa powder
  • 1 tbsp (21 g) maple syrup
  • 1.5 tsp (7 g) butter
  • 1 whole egg
  • 1 cup (240 g) milk
  • 1/2 cup (113 g) unsweetened apple sauce
  • 2 tbsp (56 g) mini chocolate chips

Method

  1. In a large bowl, mix together the oats, protein powder, cocoa powder, and baking powder.
  2. Add in the egg, milk, syrup, melted butter, apple sauce, and 1 tbsp of chocolate chips.
  3. Spray a 7x7 baking pan with neutral oil and add the oat mixture.
  4. Top with 1 tbsp of chocolate chips.
  5. Add water to the pot.  Place the crisper tray in the lower position.  Place the pan on the crisper tray.
  6. Set the Ninja Speedi for 10 minutes at 315°F on the "steam and bake" setting.  It will steam for about 20 minutes before baking.  Press start.
  7. This recipe makes 4 servings. Cut the oatmeal into 4 equal pieces.

Experiments

2023-07-02:  I basically cut off the baking at 11:30 out of 17 minutes, which left the top a bit dryer than I like.  Next time I should try just 10 minutes of baking,

2023-07-07:  Tried 10 minutes at 315°F on the "steam and bake" setting.   That was perfect:  cooked all the way through and still moist, and the top was not dried out.


How to convert recipes for an air fryer

by Don  

Source:  https://www.allrecipes.com/article/how-to-convert-recipes-for-an-air-fryer/

How To Convert Your Favorite Recipes for an Air Fryer

It’s a lot easier than you think.


French fries in an air fryer

PHOTO: HAZAL AK/GETTY IMAGES

The air fryer has surged to join the slow cooker and toaster oven as one of the most common small appliances in home kitchens. These affordable countertop units promise crisp "dry-fried" foods, juicy proteins, and crave-worthy vegetables. Which means that it's no surprise that this easy-to-use gadget has generated a flurry of air fryer cookbooks. But what if you want to make some of your old tried-and-true recipes in your air fryer? Can you convert recipes that were not originally designed with the air fryer in mind?


The short answer is yes, with a few caveats. Remember that every air fryer is different and will perform differently, especially with recipes not written specifically for your unit. So, err on the side of checking foods frequently for doneness, getting proper internal temperatures on proteins to ensure foods are fully cooked as you experiment with conversions. It can be helpful to keep notes as you go, to add to your recipes that indicate the temperatures, times, and techniques for air frying. And while air fryers can significantly reduce the amount of oil needed for cooking, for best results you will still need at least a light spray of cooking oil on your foods to help them brown and crisp properly.


Now, let's look at three kinds of recipes–deep-fried, pan-fried, and oven-baked–and talk about how to adapt these recipes for your air fryer.


How to Convert Deep-Fried Recipes for Your Air fryer

Deep-fried foods are some of the most crave-worthy, and often least healthy, foods that people want to replace with air-fried versions. (Enjoying French friesfried chicken tendersonion rings, and other crunchy indulgences without the usual volume of fat and calories might be why you bought an air fryer to begin with!)


Temperature: Standard deep fryer recipes are usually done in 350°–375°F oil: the perfect temp to make things crispy and thoroughly cooked and hot enough to prevent greasiness. Because the circulating air of an air fryer will be in less intense contact with your food than hot oil, you'll need to compensate by increasing your temperature a bit to around 390°F for anything that's traditionally deep fried.


Oil: Get that crisp right with a small amount of oil. Begin with a light spray of a high-temperature cooking oil, like avocado or canola, and halfway through cooking, either flip over or toss and give a second light spritz.


Timing: Start checking for doneness about 2/3 of the way through the standard time in your original recipe. Make sure protein internal temperatures are safe before removing them from the air fryer.


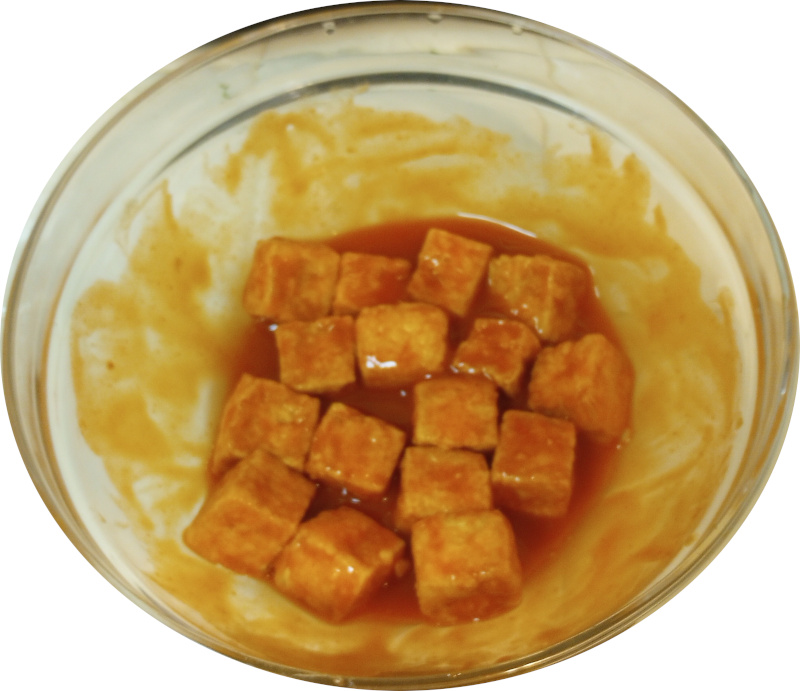
How to Convert Shallow or Pan-Fried Recipes for Your Air Fryer

Whether you are making a stir fry or browning chunks of meat for a stew, if you can do it in a shallow pan, you can do it in an air fryer.


Pan: First, make sure you have the right accessory. If the recipe you're making includes a sauce, use a non-stick accessory pan that fits inside the air fryer.


Oil: Making a battered item like onion rings or tempura? Place them in a single layer in the greased pan and lightly spray before flipping halfway through cooking.


Timing: During cooking time, be sure to stir well every couple of minutes to keep things cooking thoroughly and evenly. Begin checking for doneness 2/3 of the way through the standard time in your original recipe. Make sure protein internal temperatures are safe before removing them from the air fryer.


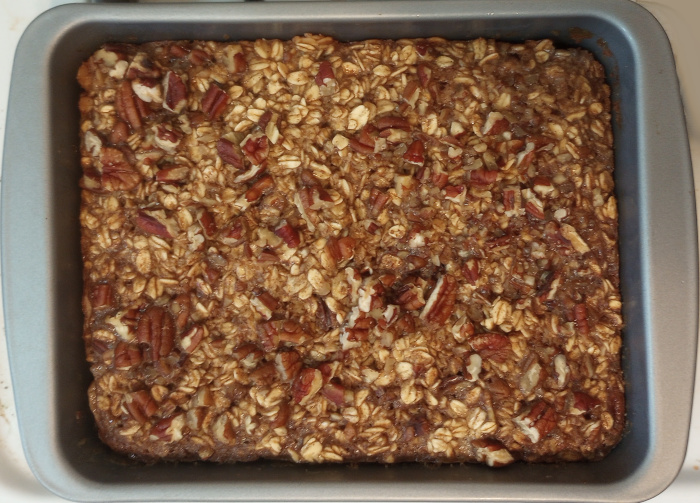
How to Convert Standard Oven Recipes for Your Air Fryer

This may be the easiest conversion of all! Just remember the number 25. Reduce the heat from your standard oven recipe by 25 degrees and reduce the time by 25%. You will still need to start checking for doneness about 2/3 of the way through the standard time in your original recipe and make sure protein internal temperatures are safe before removing them from the air fryer.

Fiery orange jalapeño salmon, attempt 1

by Don  

I'm starting to experiment with salmon, which I'm not sure I have ever cooked before, and I want to do it in my air fryer.  I purchased a 6 oz portion of fiery orange jalapeño salmon at Sprouts.  First I tried it using the broil function for five minutes with the crisper raised high.  Not nearly sufficiently cooked, so I added five minutes of baking at 300°F.  Oddly enough, that came out perfectly.

It might be more sensible, though, to do a simple bake function for a longer period of time.

Banana pecan baked oatmeal bars

by Don  

Adapted from:  video | written

Ingredients

  • 1 egg
  • 2-3 ripe bananas, sliced
  • 1 2/3 cup milk
  • 1/3 cup maple syrup
  • 1 teaspoon vanilla extract
  • 2 cups rolled oats
  • 1 teaspoon baking powder
  • 1 1/2 teaspoons cinnamon
  • 1/2 teaspoon sea salt
  • 1/2 cup pecans, chopped

Method

  1. Preheat your oven to 375F/190C and grease an 8x8 pan with cooking spray or coconut oil. Place the sliced banana coins in a single layer on the bottom of the pan until the entire pan is covered. Set aside.
  2. Add the milk, maple syrup and vanilla to the egg and whisk to combine.
  3. Lastly add in the dry ingredients, from the rolled oats to half of the chopped pecans, and stir until combined.
  4. Pour the batter into your banana lined baking pan and use a spoon to level out the top. Sprinkle the remaining pecans over the batter and gently press them down into the oatmeal.
  5. Bake the oatmeal for 35-40 minutes or until set.
  6. Cut into pieces and serve with more maple syrup, chopped pecans and fresh fruit!

2023-05-01:  Just put my first attempt in the toaster oven which I've never used for baking before, so I'm curious how it will turn out.  I almost think it puts out more heat than my regular oven.  If this works, then next time I'll try the air fryer; it's much better insulated.

This recipe worries me.  The amount of cinnamon seems excessive.  The salt seems unnecessary, considering the other oatmeal bakes I've made.  And why put so much banana in if it is not mentioned in the title?  I'm thinking unsweetened applesauce might make more sense.  And I'm using a 7x9 baking pan instead of an 8x8, which should be essentially no different.  I've also set the timer on the range since the mechanical timer on the toaster oven is less precise.

2023-05-02:  Just tried one.  This was the first time I have baked in the toaster oven.  Came out perfect.  The recipe calls them "maple pecan," but the maple is not particularly noticeable, whereas the bananas of the bottom layer are, so I've retitled them.  I have to say that I have been really fortunate with these baked oatmeal recipes.  The amount of cinnamon was also perfect.

Nutrition


Crispy buffalo tofu bites

by Don  

Source:  Ninja Speedi Quick Start Guide & Recipe Book

Ingredients

  • 1/2 cup water, for steaming
  • Nonstick cooking spray
  • 1 package (16 ounces) extra-firm tofu,
  • drained, patted dry, cut in 1-inch cubes
  • 2 tablespoons cornstarch
  • 1/2 cup Buffalo sauce

Method

  1. Pour 1/2 cup water into the pot. Push in the legs of the Crisper Tray, then place the tray in the bottom position in the pot. Spray the tray with cooking spray.
  2. In a medium bowl, add the tofu and cornstarch and gently toss until evenly coated. Then evenly spray the tofu with cooking spray. Transfer the tofu to the tray.
  3. Close the lid and flip the SmartSwitch™ to Rapid Cooker. Select STEAM & CRISP, set temperature to 390°F, and set time to 15 minutes. Press START/STOP to begin cooking; the unit will steam for approx. 3 to 4 minutes before crisping.
  4. When cooking is complete, ensure tofu is crispy. If necessary, add more time to unit for crispier tofu. Transfer tofu bites to a medium bowl and toss with Buffalo sauce. Serve hot with blue cheese and vegetable stiks as desired.

Notes:  I was impressed with the crispy results.  I'm really not all that fond of tofu, but this works okay.  I'm half tempted to try a cinnamon sugar version.

Bacon in toaster oven

by Don  

2023-04-27:  first attempt.  Four slices at 400°F for 20 minutes in baking mode, starting cold.  That wasn't crispy enough for me, so I added ten minutes.  The result with a total of 30 minutes cooking time was really good.

Next time:  try 400°F for 20 minutes but in broil mode.

2023-04-28:  second attempt.  Four slices at 400°F for 20 minutes in broiling mode, starting cold. Perfect results.

2023-07-02:  I tried the same directions as last time using jalapeno bacon from Sprouts.  The bacon burned.  I'm not sure if this is a summer-time issue, or if it's a bacon quality issue.  Certainly the bacon was much fattier.  If I use that bacon again, next time I'll try 15 minutes.

2023-07-04:  This time I again cooked jalapeno bacon from Sprouts.  I again tried 400°F for 20 minutes in broiling mode, but this time I put the try on the lower shelf, not the mid shelf.  It came out almost perfect.  Next time I should try 18 minutes.  I'm thinking the difference between summertime starting-heat and wintertime starting heat makes the difference between 18 and 20 minutes cooking time.

Pot stickers in air fryer

by Don  

Steam

2023-04-25:  Eight minutes on steam only with 1 cup of water worked perfectly at 400°F worked perfectly.

Steam and crisp

2023-04-24:  This was was my first attempt at preparing pot stickers from the US Foods CHEF'STORE at Southern and McClintock.  I started from page 54 of the Ninja Speedi "Quick Start Guide and Recipe Book" but only wanted 7 pot stickers, not a whole pound.

  1. 1/2 cup of water
  2. Rapid Cook, Steam & Crisp
  3. 400°F for 12-16 minutes
  4. Flip/shake after 8 minutes.

This was way too long for 7 pot stickers.  They were done and just starting to burn at 8 minutes, although not to burnt not to eat.

2023-07-01:  I tried 7 minutes.  Seemed to work.  Next time I should try 6 minutes.


Steak in the air fryer

by Don  

Source of idea from time-stamp 1:50:  YouTube

2023-04-23:  I got a one-inch thick ribeye from the butcher; the saleswoman at the counter was kind enough to request when she heard that I thought the others were too thick; the on-duty butcher was glad to oblige.   At home I patted it dry, dry-brined it (just salt and pepper) ten hours before cooking and put it in into the fridge on a wire rack.  An hour before cooking I put the rack on the countertop so the steak could come up to room temperature.

I intended to cook it at 250°F for four minutes per side, which was not hot enough according to my thermometer since rare is 120°F.  I ended up doing that sequence twice for a total of sixteen minutes.  In a small frying pan I added olive oil, heated it quite a bit (medium high?), and added a head of garlic cut in halves to flavor the oil.  Seared the steak.  Turned out well.

For next time:  I must remember to ask the butcher myself to make the 1" cut since they probably won't have one that skinny in the butcher case.  Next time I'll try 250°F for eight minutes on the first side and seven on the second.  I'll also use a larger frying pan and less oil--say, enough to cover a fourth of the pan--and a bit higher heat for searing.

Roasted broccoli in air fryer

by Don  

2023-04-19:  I cut up a small crown of broccoli into 1-2"pieces.  Sprayed the insert with oil.  Threw in the broccoli.  Sprayed it with oil.  Salt, pepper, granulated garlic.  Cooked for 9 minutes at 390 F, stirring every three minutes.  It turned out adequate:  still crispy, but also decently charred.  The broccoli was perhaps a touch crispier (i.e., not cooked to the center) than i would have liked.

Next time I think I'll toss the broccoli with more oil in a bowl, then add salt and pepper and garlic, then cook for 8 minutes at 390 F, stirring once at 4 minutes.

1 2 3 5 6